Sky Box
Torque 3D uses a cubemap to produce the appearance of a sky in a level. The cubemap method will allow you to create realistic looking skies that provide a sense of depth to your mission.
Adding a Sky Box
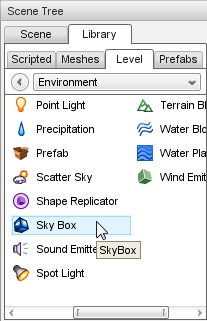
To add a new Sky Box to a level change to the Library tab in the Scene Tree panel and double-click the Environment folder, locate the Sky Box entry then double-click it.
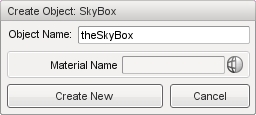
The Object Name is what you want your Sky Box to be called and will be displayed in the Scene Tree after it is created. The Material box allows you to select the starting material to use when creating the object.
Sky Box Properties
Additional properties can be changed with the Inspector pane. To change the Skybox properties using the Inspector Pane, click the Scene tab, then click the name of your new Sky Box object. The Inspector pane will update to display the current properties of your new Sky Box.
Inspector
- name
- TypeName. Optional global name of this object.
- id
- TypeCaseString. SimObjectId of this object. Read Only.
- Source Class
- TypeCaseString. Source code class of this object. Read Only.
Transform
- position
- MatrixPosition. Object world position.
- rotation
- MatrixOrientation. Object world orientation.
- scale
- Point3F. Object world scale.
Sky Box
- material
- TypeMaterialName. The name of a cubemap material for the sky box.
- drawBottom
- TypeBool. If false the bottom of the skybox is not rendered.
- fogBandHeight
- TypeF32. The height (0-1) of the fog band from the horizon to the top of the SkyBox.