Basic Sun
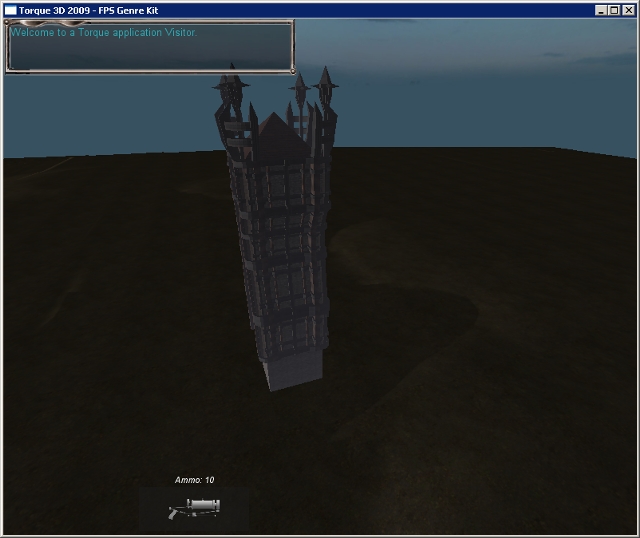
Proper global lighting can dramatically change the appearance of a level, as well as aid in certain game play aspects, such as providing a day and night cycle. The Sun object is used to control the global lighting settings in the level. The main settings include ambient coloring, azimuth, and elevation. The lighting effects produced by the Sun are 100% dynamic, which means as soon as you change a setting it is immediately reflected in the level. In short, the Sun lets you control the day/night cycle of your level.
Adding a Basic Sun
To add a Sun start by opening the Library tab in the Scene Tree dialog. Once the Library tab is active, click on Level sub-tab, then double-click the Environment subcategory.
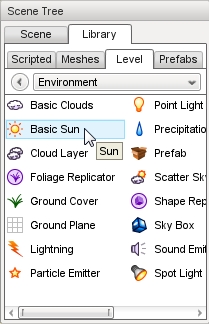
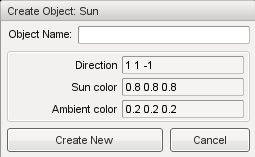
Double-clicking the Basic Sun object will open the Create Object Dialog. From here, you can change a few basic properties, such as the name, starting color, and location. Enter a name then click the Create New button.
Basic Sun Properties
Additional properties can be changed with the Inspector pane. To change the Sun properties using the Inspector Pane click the Scene tab, then click the name of your new sun object. The Inspector pane will update to display the current properties of your new sun.
Inspector
- name
- TypeName. Optional global name of this object.
- id
- TypeCaseString. SimObjectId of this object. Read Only.
- Source Class
- TypeCaseString. Source code class of this object. Read Only.
Transform
- position
- MatrixPosition. Object world position.
- rotation
- MatrixOrientation. Object world orientation.
- scale
- Point3F. Object world scale.
Transform
- azimuth
- TypeF32. The horizontal angle of the sun measured clockwise from the positive Y world axis.
- elevation
- TypeF32. The elevation angle of the sun above or below the horizon.
Lighting
- color
- TypeColorF. Color shading applied to surfaces in direct contact with light source.
- ambient
- TypeColorF. Color shading applied to surfaces not in direct contact with light source, such as in the shadows or interiors.
- brightness
- TypeF32. Adjust the global Sun contrast/intensity.
- castShadows
- TypeBool. Enables/disables shadows cast by objects due to Sun light.
Corona
- coronaEnabled
- TypeBool. Enable or disable rendering of the corona sprite.
- coronaMaterial
- TypeMaterialName. Material for the corona sprite.
- coronaScale
- TypeF32. Scale the rendered size of the corona (texture size * coronaScale = visible pixel dimensions).
- coronaTint
- TypeColorF. Modulates the corona sprite color (if coronaUseLightColor is false).
- coronaUseLightColor
- TypeBool. Modulate the corona sprite color by the color of the light (overrides coronaTint).
Misc
- flareType
- TypeLightFlareDataPtr. Datablock for the flare and corona produced by the Sun.
- flareScale
- TypeF32. Changes the size and intensity of the flare.
Advanced Lighting
- attenuationRatio
- TypePoint3F. The proportions of constant, linear, and quadratic attenuation to use for the falloff for point and spot lights.
- shadowType
- TypeEnum. The type of shadow to use on this light.
- cookie
- TypeStringFilename. A custom pattern texture which is projected from the light.
- texSize
- TypeS32. The texture size of the shadow map.
- overDarkFactor
- TypePoint4F. The ESM shadow darkening factor.
- shadowDistance
- TypeF32. The distance from the camera to extend the PSSM shadow.
- shadowSoftness
- TypeF32. Adjusts shadow edge clarity.
- numSplits
- TypeF32. The logrithmic PSSM split distance factor.
- logWeight
- TypeF32. The logrithmic PSSM split distance factor.
- fadeStartDistance
- TypeF32. Start fading shadows out at this distance. 0 equates to auto calculate this distance.
- lastSplitTerrainOnly
- TypeBool. This toggles only terrain being rendered to the last split of a PSSM shadow map.
Advanced Lighting Lightmap
- representedInLightmap
- TypeBool. This light is represented in lightmaps (static light, default: false).
- shadowDarkenColor
- TypeColorF. The color that should be used to multiply-blend dynamic shadows onto lightmapped geometry (ignored if representedInLightmap is false).
- includeLightmappedGeometryInShadow
- TypeBool. This light should render lightmapped geometry during its shadow-map update (ignored if representedInLightmap is false).
Azimuth and Elevation
The Azimuth and Elevation fields are very important to determining the global position of the sun, which affects the lighting intensity and shadow casting for every object in your level. You cannot think of these two fields as numbers that simply move your sun or make it higher. Azimuth and Elevation are actually angles:
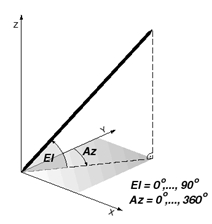
Azimuth
Elevation (El) is measured between 0 and 180 degrees. It refers to the vertical angle measured from the geometric horizon (0°) towards the zenith (+90°).
- 0° will place the Sun at one end of the horizon as though it were just about to rise or set.
- 90° will place the Sun directly over the level, shining straight down.
- 180° will place the Sun at the opposite end of the horizon as though it were just about to rise or set.
Azimuth ranges between 0 and 360 degrees, and refers to a horizontal angle which determines the direction the Sun is facing in the level.
- 0° is true North.
- 90° is due east.
- 180° is due south.
- 270 is due west.
If you have a completely flat terrain with no objects, it will be difficult for you to visually measure the position of the Sun. You can use any object you want as a reference, but make sure you have your camera fixed on it to see the changes that you are making.
Adjusting Elevation
Go ahead and set the Azimuth and Elevation of the Sun to 0, which should give you a very dark level.
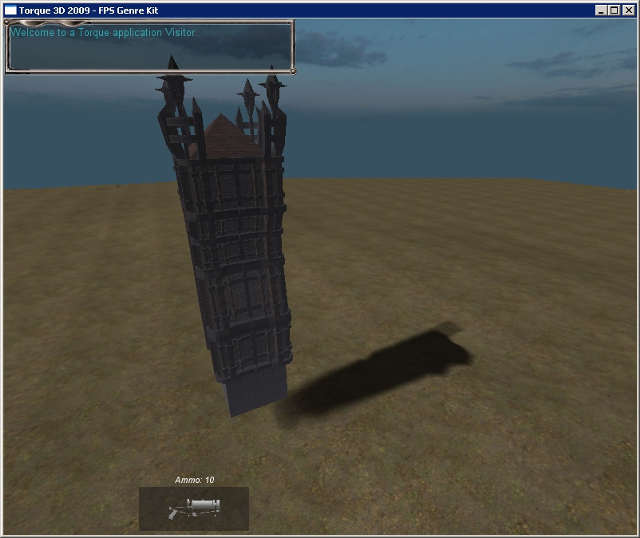
At this point, the angle of the Sun matches the horizon of your level perfectly. By increasing the elevation to 45, and you will see the objects in your level begin to cast short shadows. If you dont see the shadows changing make sure that you do not have more than one sun in your scene. The World Builder allows more than one sun in a scene, which obviously will change the light and shadows within a level.
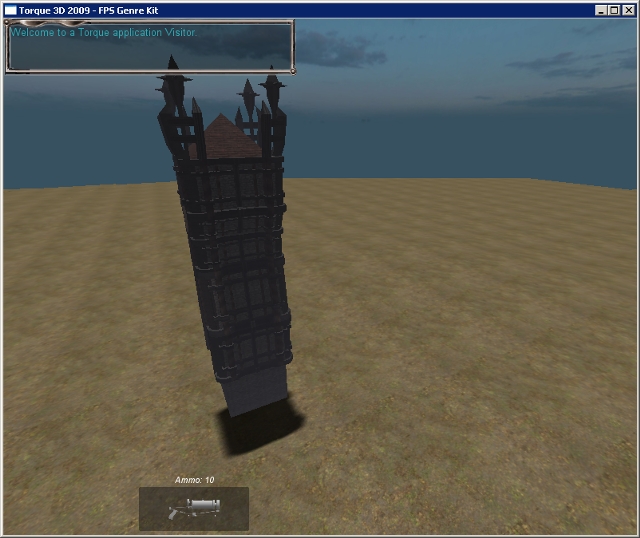
Thinking back to angles, if 0° is parallel with the horizon, then 90° degrees will be directly overhead. Change the elevation to 90. You will see all of the shadows for the objects are directly below, just as in real life when the sun is sitting at zenith (straight overhead).
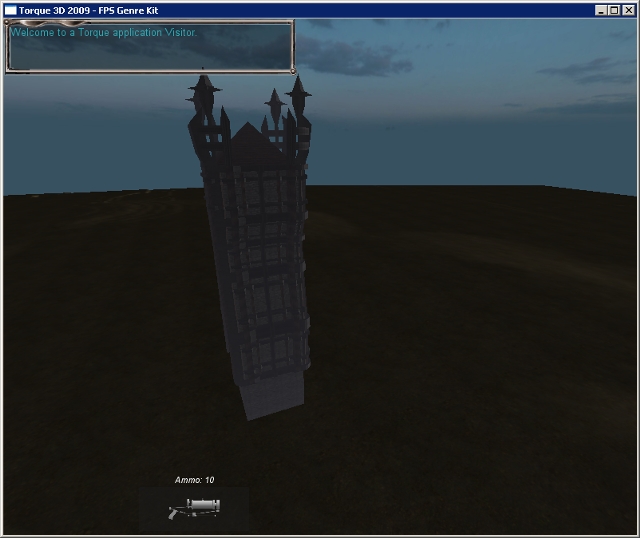
Setting the elevation to 180 will place the Sun at the opposite end of the horizon, once again resulting in a dark level. If you really focus, there is a slight change in shadow direction than when the elevation was 0°.
Adjusting Azimuth
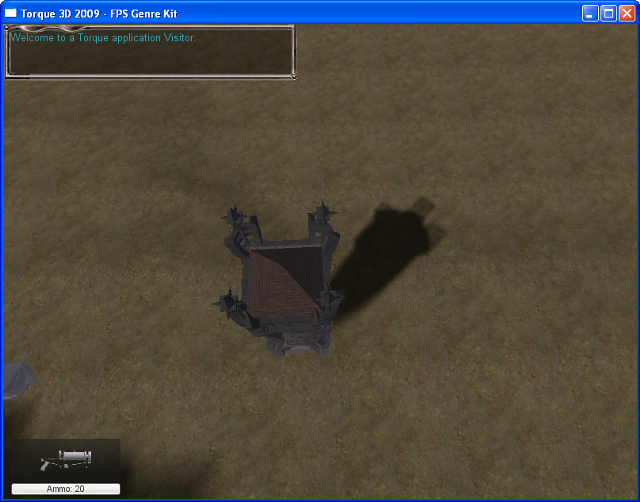
The Azimuth of the Sun is measured clockwise from a fixed overhead perspective. To help you understand this rotation, we are going to adjust the Aazimuth of the Sun so that shadows of an object rotate like a sun dial or hands on a clock.
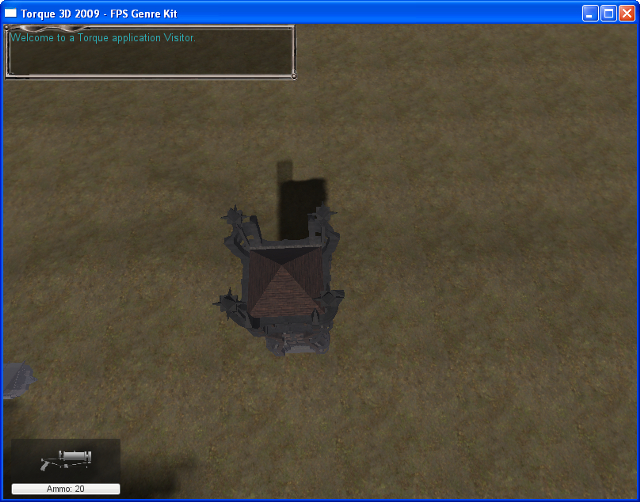
If you set the elevation to 45 and azimuth to 0, it will look like the shadow is pointing at 12 o’clock (if viewed from overhead).
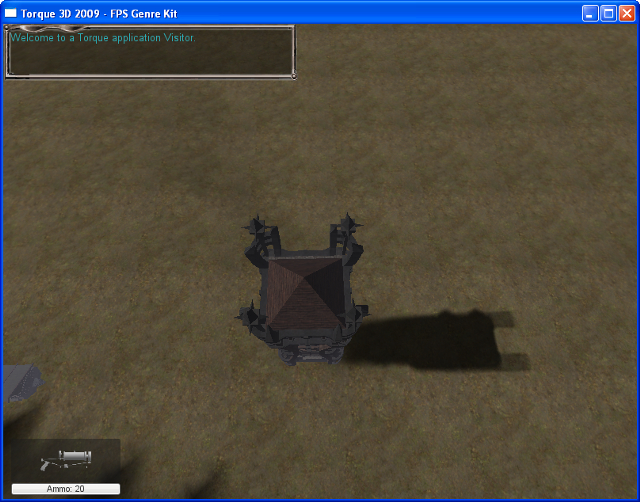
Now, increase the azimuth by 45. At a sharp 45° angle, the shadow looks like it is pointing at 1 o’clock.
If you set the azimuth property to 90, you will notice a very familiar angle. The object and its shadow are forming a perfect right angle.
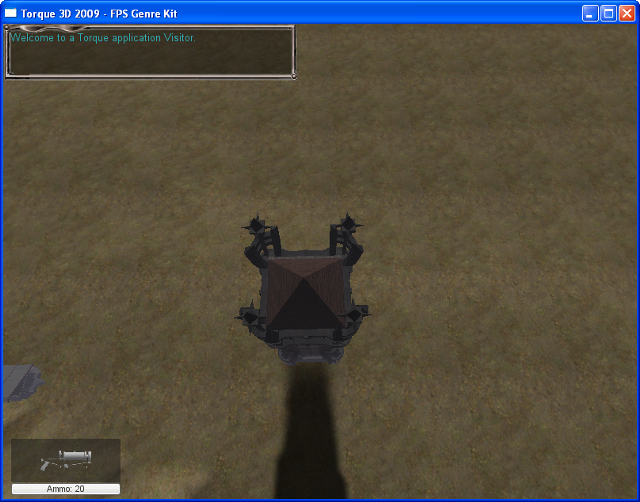
Half of a full rotation is 180°. After Setting the azimuth to this value, the shadow will now be pointing in the opposite direction from its original state.
Now, set the azimuth property to 270 and watch as the shadow points to 9 O’clock. The shadow should be pointing directly opposite from the 90° setting.
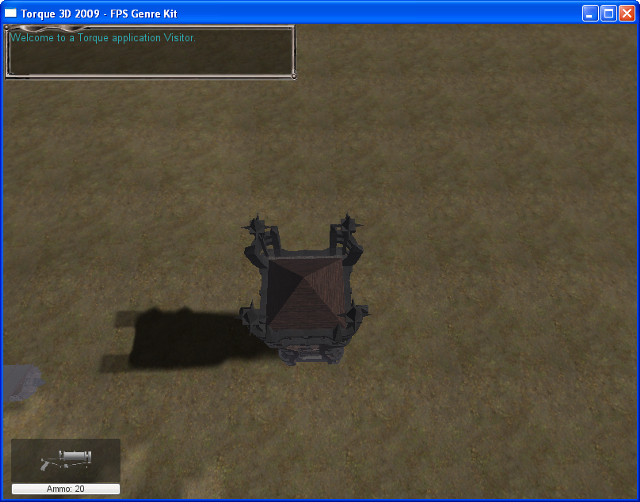
Finally, set the azimuth to 360. We have achieved full rotation. Careful examination will show that even though your shadows are pointing in the same direction as the 0° setting, they have been flipped.
Standard Lighting
The last topic we are going to touch on that is specific to the Sun object is standard lighting. Under the Lighting properties of the sun object there are three variables to adjust. Checking the castShadows box will cause surfaces to project shadows based on the direction of the sunlight. Removing the check will disable any shadows cast due to the Sun. If you uncheck that box you’ll see that the shadows you have been observing will not be displayed at all.
In addition to creating shadows, the light from the Sun will also affect the color shading of all surfaces in the level. There is a subtle, yet important difference between the color and ambient fields. If you want realistic lighting color, you will need to tweak both values.
The value of the color field will shade all surfaces that are in direct contact with the sunlight. A completely black color will make it seem like there is no light at all. Using the color picker to choose an orange hue will result in a sunset appearance for your level.
Ambient light is the available light in a space, whether from natural or mechanical sources. It is applied to everything in the world and also contributes to the direct lighting of the sun. The ambient field will lighten dark shadows and brighten well lit surfaces based on the color value.