Ground Plane
The Ground Plane object provides you with a solid piece of geometry that acts as floor for a level, while avoiding the use of a terrain object or big plane mesh. You can assign a material to the Ground Plane so that it has a unique appearance. Unlike terrain, a Ground Plane cannot be manipulated like a normal ground surface raising or lowering areas of it.
From a practical perspective, the Ground Plane object is most useful for creating prototype missions or experimenting with models or other objects. An example would be creating a demo to show a model or material, when you do not care about the surface you are displaying them on. This type of situation only requires a flat surface within the level to drop them on. A Ground Plane object is a perfect candidate to supply that surface. For actual game play levels, you will most likely want to use a TerrainBlock.
Adding a Ground Plane
To add a Ground Plane to a level, switch to the Object Editor tool and select the Library tab. Click on the Level tab. Double-click the Environment folder and locate the Ground Plane entry.
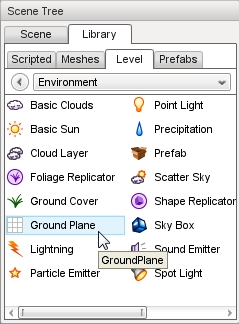
Double-click the GroundPlane entry.
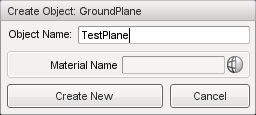
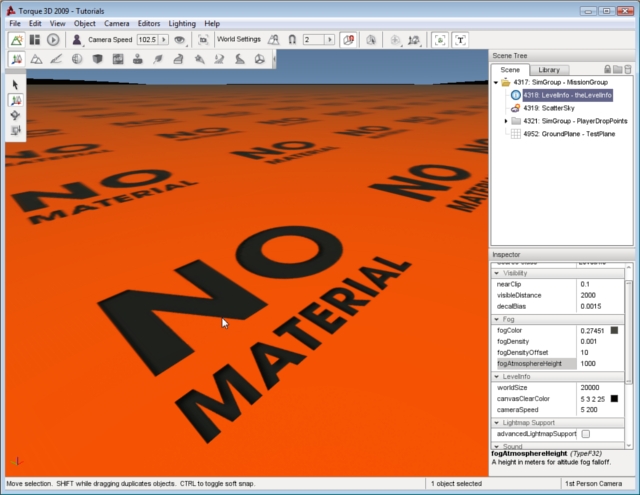
A new GroundPlane will automatically be added to your scene. A “no material” orange texture will be applied.
Ground Plane Properties
Properties can be changed with the Inspector pane. To change a Ground Planes properties using the Inspector Pane click the Scene tab, then click the name of your new Ground Plane object. The Inspector pane will update to display the current properties of your new Ground Plane.
Inspector
- Name
- TypeName. Optional global name of this object.
- id
- TypeCaseString. SimObjectId of this object. Read Only.
- Source Class
- TypeCaseString. Source code class of this object. Read Only.
Plane
- squareSize
- F32. World units per grid cell edge.
- scaleU
- F32. Scale factor for U texture coordinates.
- scaleV
- F32. Scale factor for V texture coordinates.
- Material
- TypeMaterialName. Instantiated material based on given material name.
Editing
- isRenderEnabled
- TypeBool. Toggles whether the object is rendered.
- isSelectionEnabled
- TypeBool. Toggles whether the object is selectable in the editor.
- hidden
- TypeBool. Toggles whether the object is visible.
- locked
- TypeBool. Toggles whether the object is editable.
Mounting
- mountPID
- TypeName. PersistentID of the object we are mounted to.
- mountNode
- TypeName. Node object is mounted to.
- mountPos
- TypeName. Position in relation to the mounted node.
- mountRot
- TypeName. Rotation in relation to the mounted node.
Object
- internalName
- typeString. Non-unique name used by child objects of a group.
- parentGroup
- typeString. Group object belongs to.
- class
- TypeString. Links object to a script class namepsace.
- superClass
- TypeString. Links object to a script super class (parent) namespace.
Persistence
- canSave
- TypeName. Optional global name of this object.
- canSaveDynamicFields
- typeBool. True if dynamic fields (added at runtime) should be saved, defaults to true.
- persistentId
- TypeName. Optional global name of this object.
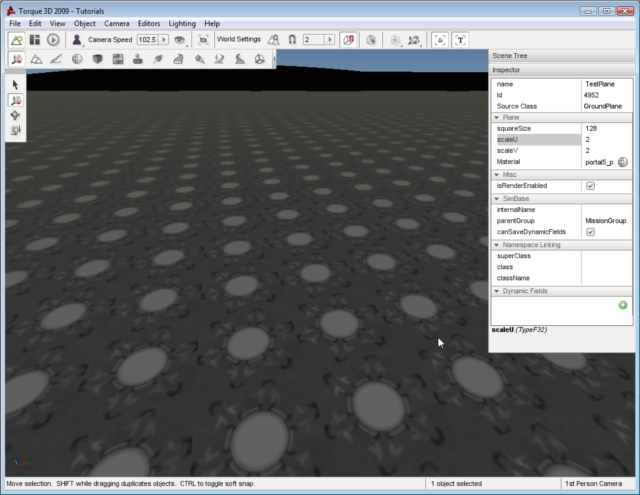
Modifying Scale
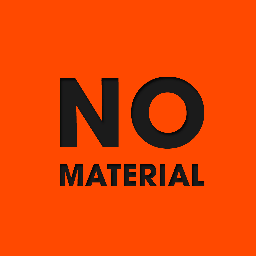
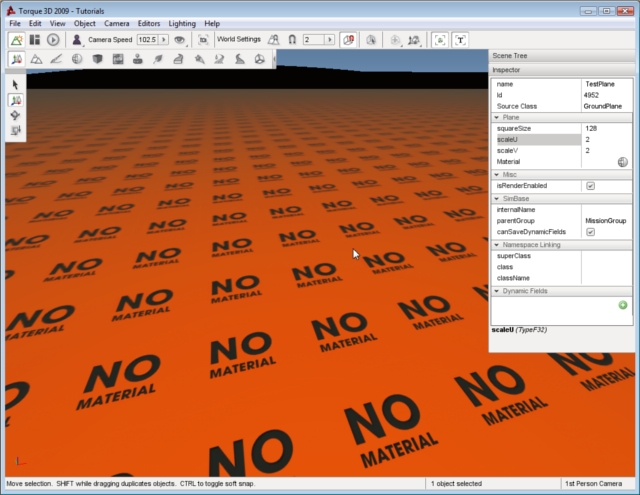
The material currently displayed on the object is a general warning texture:
You can change the way this material is tiled across the plane by adjusting the square size and UV scale. Scroll through the properties until you get to the Plane set.
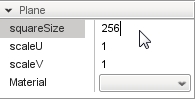
Start by observing the squareSize. At 256, you will notice that each tile is large and stretching the material further. We can push more tiles per meter with tighter UV scaling. Set the squareSize to 128, then set scaleU and scaleV to 2.
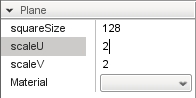
The words on the material are much closer and appear to have been shrunken.
Changing Material
The warning material is a bit of an eyesore, so we will change that now. Click on the Material property in the Plane section of properties to bring up a list of available materials.
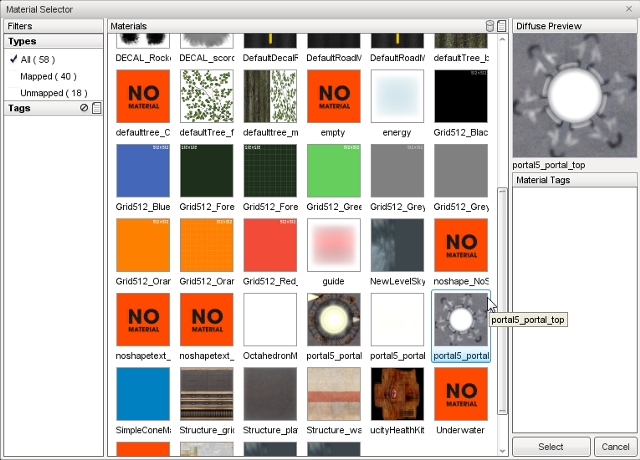
Select a material then click the Select button. Your GroundPlane will automatically be updated to use the new material you have selected.
That is the extent of your control over the material displayed on a GroundPlane. If you are using an extremely large texture, you could increase the squareSize and UV scale to make the tiling less blatant.