Sketch Tool
The Sketch Tool is a tool that allows you to quickly generate meshes without going to 3rd party modeling applications, such as Maya or 3DS Max. It is not meant to create final or game ready art, just rough shapes that are placeholders for your real art. For example, you can use this tool to sketch the shape of a building you want. The rough design can fit your needs for a simple design and estimated measurements.
Interface
To switch to the Material Editor press the F4 key or from the main menu select Editors > Material Editor or click on the orange box icon to get started.
The Tools Palette will populate with basic manipulation icons:
- Select Object
- Select a convex object or individual face
- Translate
- Move an individual face
- Rotate Object
- Rotate an individual face
- Scale Object
- Grow or shrink an individual face
As with the other editors, extremely helpful usage hints will be displayed in the bottom left corner of the editor. Shortcuts and basic descriptions will appear based on which tool you are using.
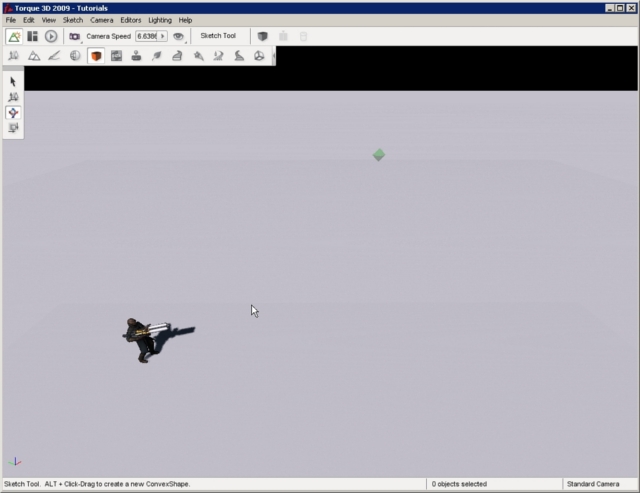
Creating a Convex Shape
The very basic interface allows you to quickly sketch out convex shapes. All of your editing can be performed via mouse actions. To begin creating a convex shape, hold down the Alt key and left mouse button to begin drawing a base. The base will follow where your mouse cursor is being dragged, shrinking or growing as it goes.
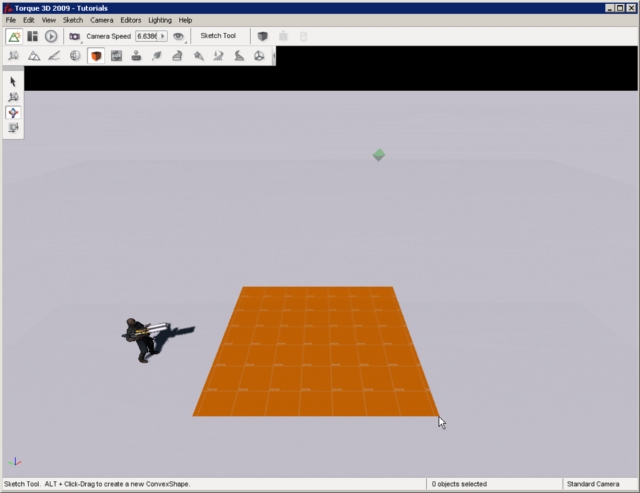
Once you let go of your mouse button, the base will stop growing. From here you can move your mouse cursor up and down to change the height of your new box. You do not have to hold down the mouse button during this time.
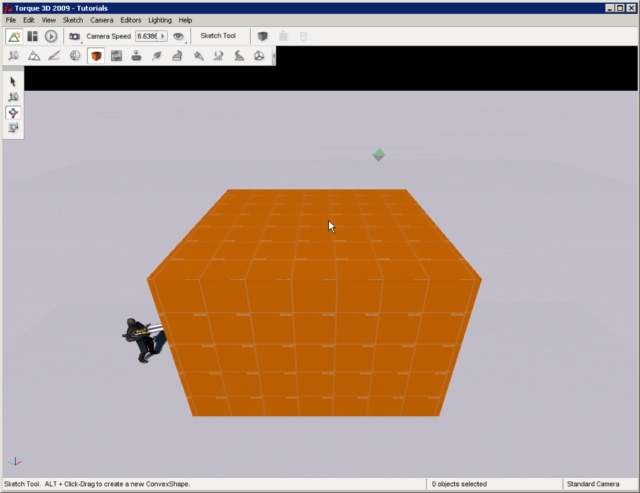
Once you are happy with your convex shape’s height, left click one last time. The box will become a solid object and automatically be selected. If you make a mistake, hit Ctrl-Z to undo and erase the shape then repeat the process.
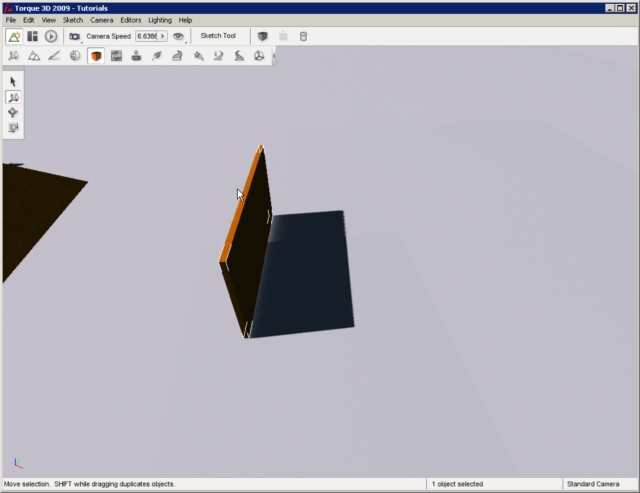
When you are ready to begin shaping the box, left click one of its faces. The currently selected face will be highlighted in bright pink:
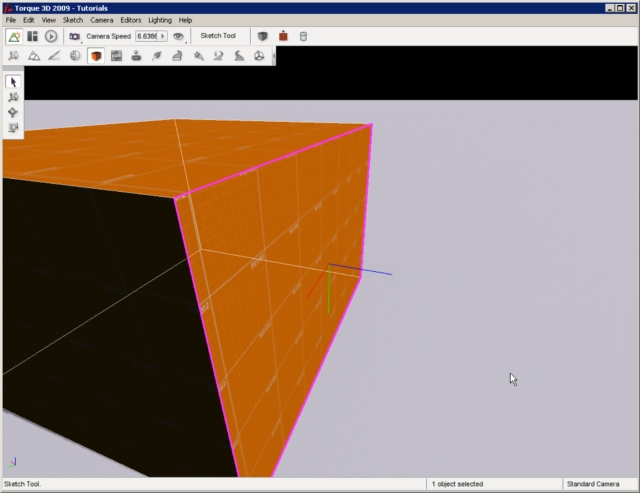
At this point, you can start using the Sketch tools to edit the specific face you have selected.
Editing a Convex Shape
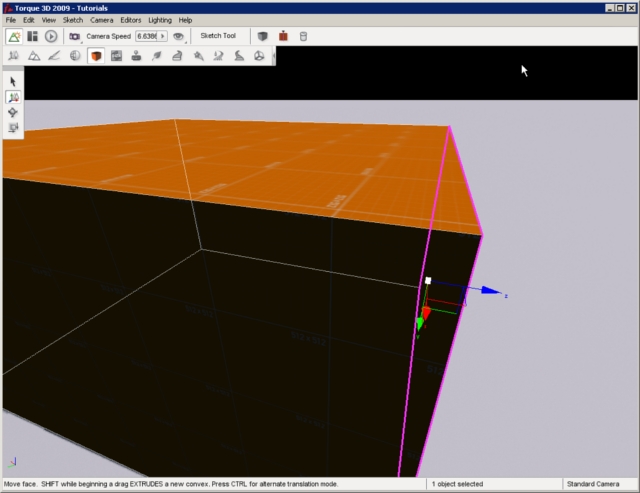
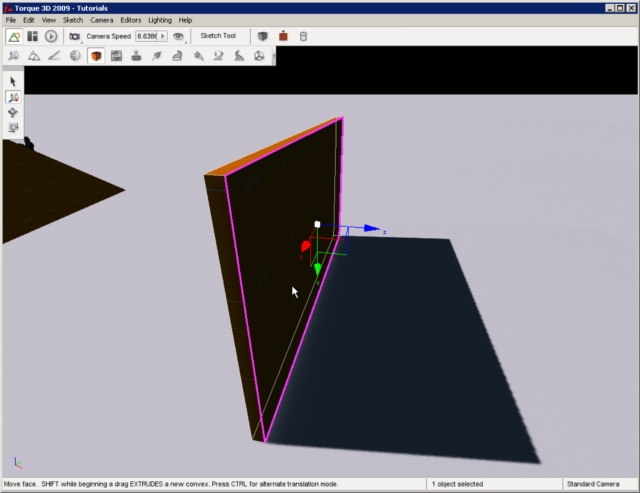
Let’s move some surfaces around. Start by selecting a faceof the object by (left clicking on it). Three colored lines will now extend from the center of that face - these represent the axes for the three dimensions x, y and z. This is called the axis gizmo. Activate the Move Selection tool by clicking the icon on the Tools Palette on the left of the screen or press the shortcut key 2:
Once the Move Selection tool is activated, arrows will appear on the ends of the axis gizmo. Click on the X-axis and drag it outward. Your face will move in the direction you are dragging your mouse. The entire convex shape will adjust according to where the face as moved. You will be able to move the face in any direction in three-space:
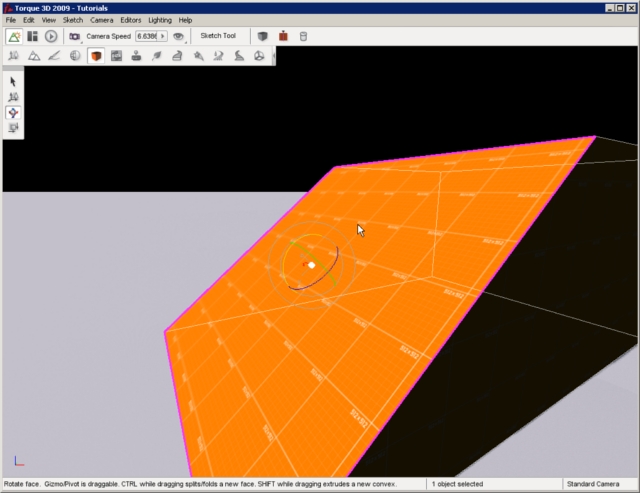
Next, activate the Rotate Selection tool by clicking the icon on the Tools Palette on the left of the screen or press the shortcut key 3. A spherical gizmo will appear representing the orientation manipulators. The axis gizmo straight lines will now be displayed as three curved colored lines:

Click and hold one of the colored lines (an axis), and drag it in a direction. The selected face will begin to slope according to the new orientation:
Finally, activate the Scale Selection tool by clicking the icon on the Tools Palette on the left of the screen or pressing the shortcut key 4. Click on the top face of the box. A squared like gizmo will appear which will allow you to choose what parameters to adjust. You can adjust the (width, height, depth, or any combination of the three):
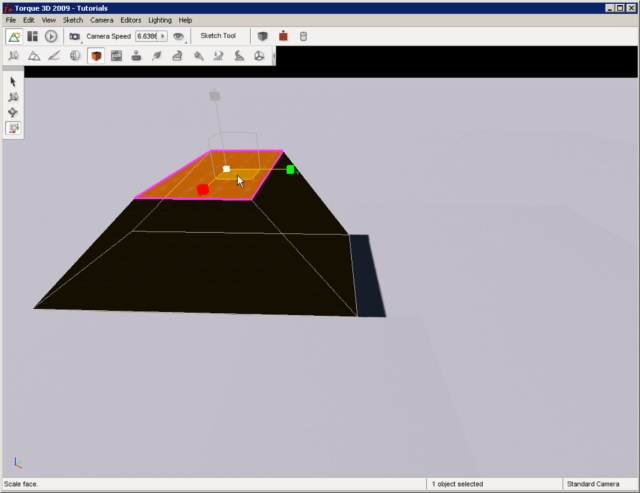
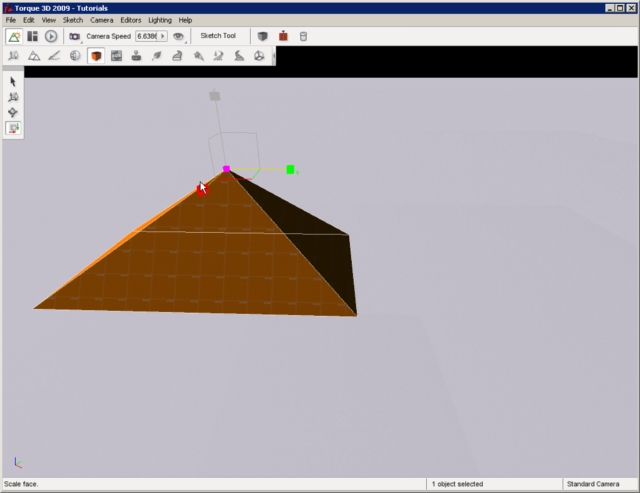
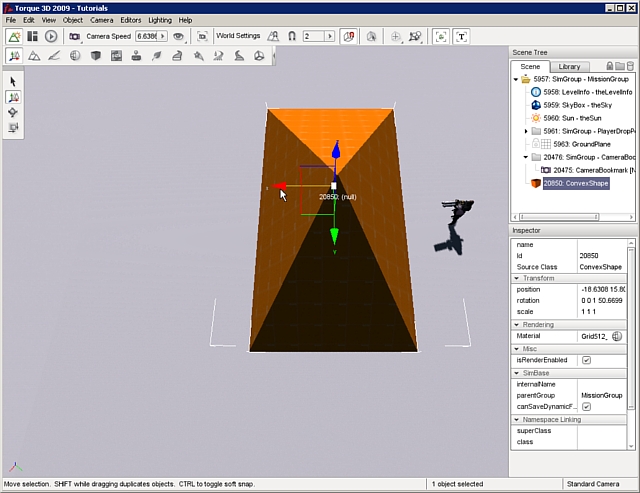
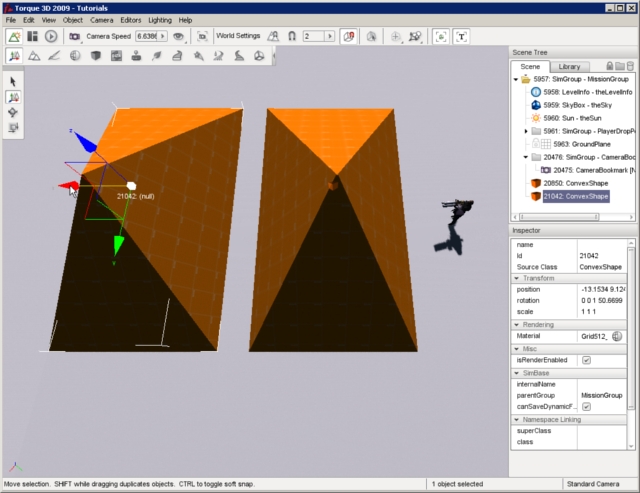
Instead of adjusting one parameter at a time, we are going to adjust width and height. Move your mouse over the different squares to see how they highlight. Click the bottom square of the gizmo, in between the red X and yellow Y axis and hold down the mouse button. Drag your mouse in either direction to shrink or grow the face. The more you shrink, the more like a pyramid it will be come:
The last action this guide will address is extruding. The Sketch Tool extruding feature creates new geometry from a selected a face. Start by creating a new convex shape - review the section, Creating a Convex Shape, if you don’t remember how.
Next click on a single face of the shape. Make sure you have a face selected, and not the entire object. The selected face should be highlighted with a in bright pink. Activate the Move Selection tool. A hint will display at the bottom of the editor: “Move selection. Shift while beginning a drag extrudes a new convex.”
Perform this action as described. With the face selected, hold down the Shift key, move the mouse over one of the colored arrows, and click and drag outwards from the object. The exact dimensions of the original face will be duplicated, constructing a new convex based on those parameters. This may not be apparent until you click on a face and see that the area of the new face is separate from the original:

You can now select faces on the new convex object and continue editing it as a new object:
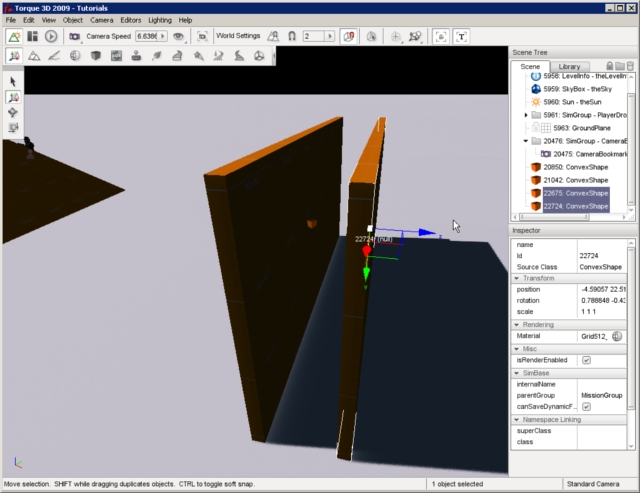
Object Manipulation
When you are finished sculpting a convex shape, you can manipulate it as you would with any other game object using the Object Editor. This includes selection, translation/rotation/scaling, and editing specific properties.
Unlike the Sketch Tool, selecting a convex shape using the Object Editor it treats the object as a whole. There is no individual face selection. Switch to the Object Editor by pressing the F1 key then click on one of your objects:
You may then manipulate the object using the normal Move Selection, Rotate Selection, and Scale Selection tools of the Object Editor. You can even use the other more complex Object Editor commands such as copying an object. To copy the object: hold the Shift key; activate the Move Selection tool by pressing the 2 hotkey; press and hold the Shift key; then drag the mouse to a new position in any direction. When you release the mouse button you will have a new duplicate copy of the original object:
This can also be used for mass production of objects by copying multiple objects at once. Change back to the Select Arrow tool by pressing the 1 hotkey. Click one of your objects to select it. Take note of the position of the gizmo that appears and the little cube at the gizmos origin. Now select the other object. Again take note of the position of the gizmo and the cube for this object. Now press and hold down the Shift key then click your other object again. You will notice there are now two small cubes, one over each object, and one gizmo relatively near the center of the two objects. This indicates that both objects are currently selected. You now have a selection group.
Change to the Move Tool by pressing the 2 hotkey. The cubes will disappear, and large arrows will appear on the ends of the gizmo. If you mouse over either object, you will see a faint transparent cube pop up. This indicates that object is a part of the selection group. Clicking any arrow and dragging the mouse will not move all the objects at once. Likewise, pressing and holding down the Shift key, then clicking and drag will duplicate all the objects in the selection group:
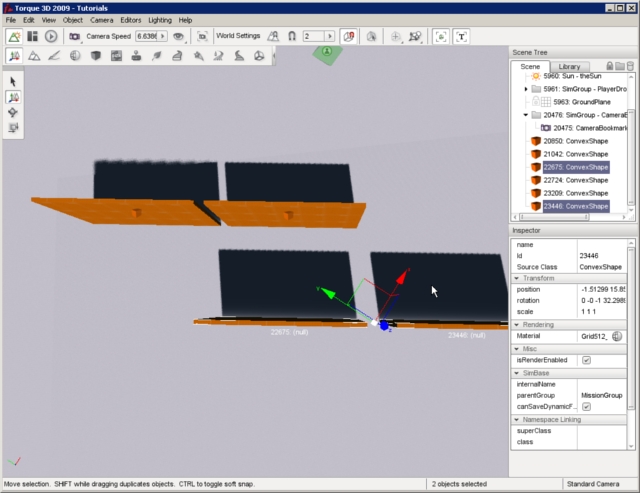
The new copy of the objects will now be the current selection and they can be moved as a group or immediately copied again with another Shift-drag operation. The above method combined with rearranging the individual objects after copying them is a great way to piece together multiple convex shapes to create more complex arrangements. For example, you might have unique convex objects for a roof, wall, chimney, and so on. You could only create one wall, then duplicate it four times so that they are all the same size then arrange them into a building with the Move Selection tool:
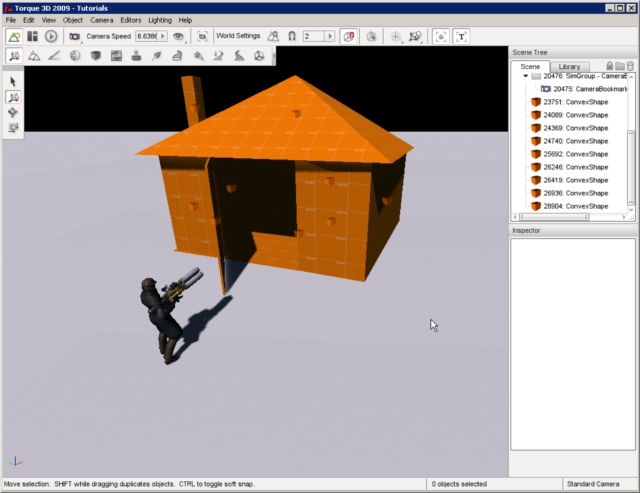
Once you get the hang of the Sketch Tool, you can sculpt unique and complex shapes. Entire levels can be prototyped to use placeholder art, created right inside Torque 3D, while you or your artists work on the final assets using the tools that they are familiar with.